VOICE Home Page: http://www.os2voice.org
[Newsletter Index]
[Previous Page] [Next Page]
[Feature Index]

VOICE Home Page: http://www.os2voice.org |
November 2002
[Newsletter Index]
|
| By Manfred Agne © November 2002 |
Recently,
I bought a Palm m105 . For
those of you who haven't seen one before, the Palm m105 is a hand-held computer
with a 160 x 160 pixel, 16 level grayscale display and 8 megabytes RAM. It comes
with a few pre-installed PIM applications, notably an electronic calendar, a memo
pad for text entries, a to-do list with a simple alarm function, a calculator,
a note pad for drawing and storing simple free-hand sketches, and an address book.
It also comes with a cradle which connects to a PC's serial port, and of course
the inevitable CD-ROM with software for Windows.

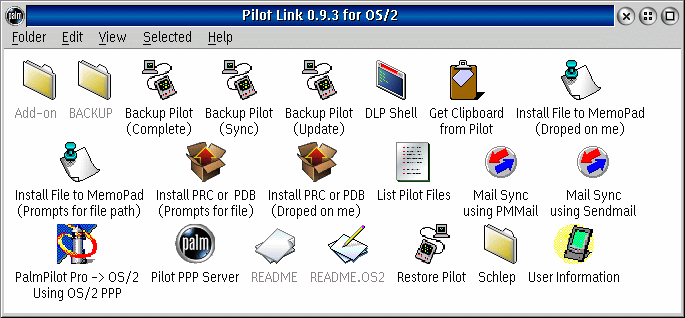
First of all, we will need to download and install Pilot Link. You should also make sure that PPP.EXE is present on the OS/2 machine.
Open the settings notebook of the 'Pilot PPP Server' object in the Plot Link folder and remove 'defaultroute' from the parameter line. You might want to add a netmask statement, eg. 'netmask 255.255.255.0', but I don't think this is necessary. Anyhow, I have it. The two IP numbers are those that you specified when the Pilot Link installation program was executed; it defaults to 10.1.0.1:10.1.0.2. They determine the IP numbers of the OS/2 machine and the Palm on the PPP connection. I have an Ethernet LAN at home and tried to use the LAN address of the OS/2 machine for the PPP connection. This didn't work, and I had to specify a different address. Currently, I use 192.168.69.126 on the LAN, and 192.168.1.1 on the PPP connection; the Palm gets 192.168.1.2. Please leave the speed settings at the default (19200), as there seem to be problems on many machines with higher speed configurations. We can tweak this parameter later, when everything is running smoothly. Finally the COM port defined on the parameter line needs to reflect the serial port to which the cradle is connected. Close the settings notebook to save the changes.
I assume that you have Changi up and running, and that you have access to the newsgroups from the PC that runs Changi. However, to be able to use Changi from any other computer (including the Palm device), you will need to create an 'nntp_access' file in the home directory of Changi. In my case, the file has the following content:
127.0.0.1 both post *
192.168.69.125 both post *
192.168.69.127 both post *
192.168.1.2 both post *
The available options are explained in detail in the Changi manual, see NNTPACCESS.HTM. In the above example, the first line allows the local host ('127.0.0.1') to read and bulk-download ('both') and post to ('post') all available newsgroups ('*'). With the next two lines, the other PCs on our LAN are given the same permissions. The last line of the file enables access for the Palm's IP address on the PPP connection. Note that you can replace the IP addresses in this file with the host names of the respective machines if you configure them in the hosts file, or if a DNS server is available (provided that you know how to tell the DNS server about the PPP connection - I have no idea how to do that). Note that the Palm's IP address specified in the parameter field of the 'Pilot PPP server' must match the address appearing in Changi's nntp_access file.
With these modifications, the OS/2 system is ready, and we can proceed to the configuration of the handheld computer:
On the Palm, open the 'Prefs' program, click on the text in the upper right corner of the screen, and select 'Connection' from the drop-down menu. Select 'new', and give the connection any meaningful name, eg. 'ppp' or whatever. Select 'Serial to PC' for the connection method and click on 'Details ...'. Under speed, select '19200 bps' - this entry needs to match the settings of the 'Pilot PPP Server' object! The 'FlowCtl' settings can remain as they are ('automatic'), or you can set them to 'on' for hardware flow control. Be careful - 'on' may or may not work! Click on 'OK' twice to return to the first screen of the 'Prefs' / 'Connections' program.
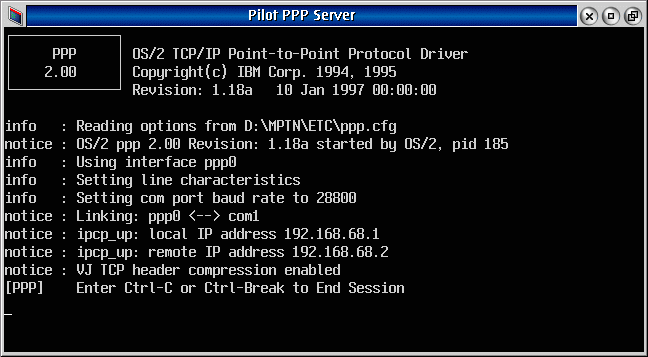
Now, select 'Network' from the drop-down menu in the upper right corner. For service, select 'Direct PPP', and under 'Connection', select the connection that you created before ('ppp' if you followed my suggestion). Click on 'Details ...' and make sure that the connection type is 'PPP', that 'IP address automatic' is checked, and that 'Query DNS' is unchecked (unless you are absolutely sure that you need DNS). Click on 'Script', and check that the following page contains only the line 'END:'. If there is more, set the first line to 'END:', and the rest will vanish automatically. Click on 'OK' twice to return to the first screen of the 'Prefs' / 'Network' program. This should be sufficient to get basic connectivity between the Palm and your desktop PC. To test this, put you Palm in the cradle, start the 'Pilot PPP server', and click on 'Connect' in the first screen of the 'Prefs' / 'Network' program. You should briefly see the three status messages 'Initializing', 'Signing On' and 'Established' on the Palm, and the PPP window on the PC should show the following output:

If you get any error messages, or if pinging the Palm doesn't work properly, check your setup. If you are having difficulties, you might also want to have a look at the webpage 'Connecting a Palm to Linux using PPP' for further guidance. In all other cases: Congratulations!
When everything is working smoothly, download 'Yanoff' from Sourceforge and install it on your Palm Pilot by dropping the file 'yanoff.prc' onto the 'Install PRC or PDB (Dropped on me)' object in the Pilot Link folder. On the Palm, open Yanoff and select 'Misc', 'Server Prefs' from the menu bar. Enter the name of your mail server in the 'Name' field, it's IP number in the address field, and your mail address in the 'Reply-To' field. Click on '>>', fill in the next page, and confirm with 'OK'. Define the newsserver by repeating this process with the corresponding entries for the computer which runs Changi. Finally, subscribe to one or more newsgroups via the 'Management' - 'Subscribe' menu. Finally, select 'Comm' - 'Poll Prefs' from the menu and set 'Get' to 'New Articles', 'From' to the previously defined newsserver (or 'all servers' if you want to read mail with Yanoff too), and make sure that 'Post news' is checked. Click on 'Save/Poll' to save these settings and load the first messages.
There is a host of other options available, mostly for minimizing the storage required. I will not discuss them here, as they are discussed in detail in the manual that comes with Yanoff (HTML, PDF). However, for a first attempt, these options are not required.

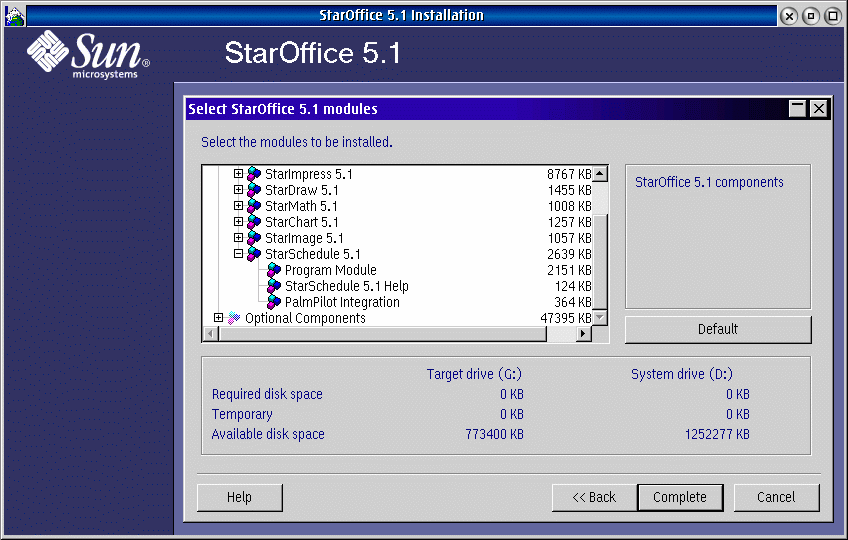
Select the 'Palm Pilot Integration', and click on 'Complete'. After successful installation, there's a subdirectory \office51\palmplt\, and in this directory, you should find the file starsync.prc. Once this is installed on the Palm, it is possible to fire up StarOffice, put the Organizer in the cradle, and press the 'sync' button to synchronize the Palm with the PIM.
Note however that this is not a full backup of your Palmtop by any means. StarOffie
has no place for your memo pad or note pad entries, and of course it does also not
handle additional programs installed on the Palm or their data.

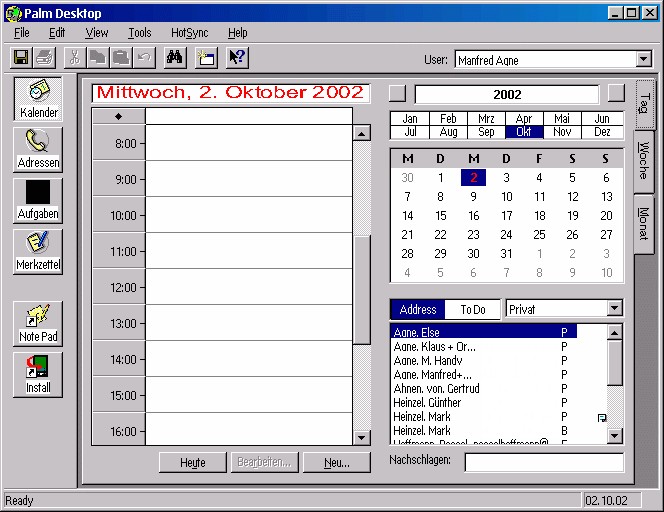
The Palm Desktop will, however, only synchronise with the Palm if the included application 'hotsync.exe' is started beforehand. I created the following CMD file:
g:
cd G:\WIN32\PALM
start G:\ODIN\SYSTEM32\PE.EXE G:\WIN32\PALM\HOTSYNC.EXE
start G:\ODIN\SYSTEM32\PE.EXE G:\WIN32\PALM\PALM.EXE
exit
The Palm Desktop works well with this script, but it has the disadvantage that HOTSYNC.EXE keeps running even after termination of the visible desktop program, and this blocks access to the COM port for other programs. I'm sure this problem can be overcome, but I didn't try; I don't use the Windows application anyway.
References:
|
[Feature Index]
editor@os2voice.org
[Previous Page] [Newsletter Index] [Next Page]
VOICE Home Page: http://www.os2voice.org